
How to Create Magnetic Cat-Eye and Velvet Nails: Magnet Angles Explained
Magnetic cat-eye and velvet nails look like optical magic, yet the physics behind them is wonderfully straightforward. Fine iron-oxide shimmer particles float freely inside uncured magnetic gel until a neodymium magnet pushes or pulls them into alignment. Once you learn how the magnet's poles interact with the wet gel, you can create either a razor-sharp diagonal beam or a plush, all-over crushed-velvet glow on demand.
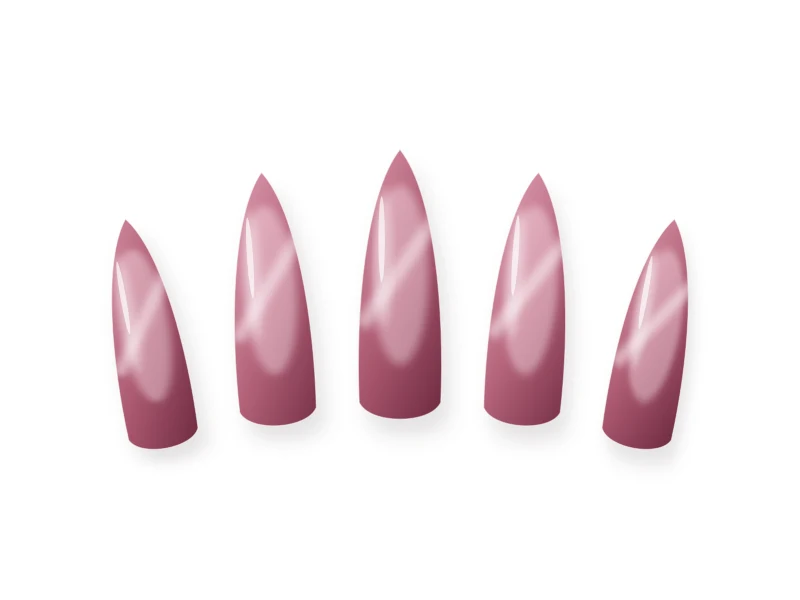
Overview of the Nail Design
Working one finger at a time is the golden rule of magnetic nail art. Because gravity and surface tension slowly cause suspended particles to drift back out of formation, flash-curing each nail for 10 seconds right after magnetizing freezes the shimmer at peak brilliance.
Generic Tools and Materials Needed
You only need standard, generic manicure tools to practice this technique cleanly:
- 180/240-grit file, soft buffer, wooden cuticle stick, lint-free wipes, and alcohol
- UV/LED nail lamp
- Gel base coat and glossy no-wipe gel top coat
- Optional base color (sheer rose, milky neutral, or black depending on desired depth)
- Fine-particle magnetic cat-eye gel
- Neodymium bar magnet (cylindrical or rectangular) and/or U-shaped horseshoe magnet
- Botanical cuticle oil
Nail Preparation
- Prep cuticles cleanly, shape all nails evenly, gently remove surface shine, and cleanse with isopropyl alcohol.
- Before starting, practice hovering your magnet over a swatch or paper to notice which end attracts particles and which end repels them—this takes ten seconds and saves endless frustration.
Step-by-Step Instructions
-
Step 1
Apply Base Coat and Optional Under-Tone
Apply a thin layer of gel base coat and cure fully. If you want high-contrast drama, apply one thin coat of deep burgundy, black, or rose and cure; for ethereal glass-velvet nails, leave the base clear or sheer blush.
-
Step 2
Apply One Even Coat of Magnetic Gel (One Finger at a Time)
Coat a single nail with a smooth, medium-thin layer of magnetic gel—thick enough for particles to move freely, but never thick enough to flood the cuticles. Do not cure yet.
-
Step 3
Sculpt the Velvet Effect (4-Side Perimeter Push)
Hold the rectangular edge of your neodymium bar magnet parallel to the left sidewall about 2mm to 3mm away for 4 seconds to push the bright shimmer toward the center. Repeat along the right sidewall, then the cuticle edge, and finally the free edge. (Alternatively, rest your finger inside a U-shaped horseshoe magnet for 8 seconds for an instant plush velvet glow.)
-
Step 4
Or Sculpt a Classic Diagonal Cat-Eye Beam
Instead of pushing from four sides, hold the narrow edge of the bar magnet diagonally across the nail 3mm above the surface for 5 to 8 seconds until a crisp luminous ribbon forms from one corner to the opposite corner.
-
Step 5
Flash-Cure Immediately for 10 Seconds
The instant the shimmer looks luminous and centered, place that finger into the UV/LED lamp for 10 seconds to lock the particles in place. Repeat steps 2 through 5 for the remaining fingers.
-
Step 6
Optional: Second Layer or Translucent Jelly Overlay
For ultra-plush depth, repeat a second magnetized layer, or glaze a cured silver magnetic layer with one thin coat of translucent red or pink jelly gel for a jewel-like ruby velvet effect. Full-cure the entire hand for 60 seconds.
-
Step 7
Seal with Mirror-Gloss Top Coat
Finish with a smooth, self-leveling glossy top coat, cure fully, and nourish the cuticles with oil.
Beginner-Friendly Tips
- Work under good overhead lighting so you can tilt your finger slightly and see the magnetic shimmer shift before curing.
- If you don't like the magnetic pattern on a nail, simply brush over the wet gel once with your brush to reset the particles and try again—no removal required!
Common Mistakes to Avoid
- Magnetizing all five fingers before curing, which lets the first three fingers lose their crisp shimmer while you work on the last two.
- Holding the magnet too far away (over 1cm), resulting in sluggish, muddy particle movement.
- Touching the wet gel with the magnet—rest your magnet hand on the table for steady control.
Troubleshooting & Professional Finishing
- Shimmer disappears completely when I bring the magnet close: You are holding the repelling pole directly over the center, pushing particles down into the base. Flip the magnet around or hover along the sidewalls instead.
- Patchy velvet glow: Apply a slightly more even coat of magnetic gel and spend 2 extra seconds pushing evenly from both sidewalls.
Finishing Technique
Magnetic finishes thrive under high-clarity glass top coats. Avoid matte top coats over velvet nails unless you intentionally want a muted satin look, as matte diffuses the three-dimensional light play.
Alternative Design Variations
- Glass-Bead Jelly Velvet: Magnetize fine silver cat-eye gel into a plush velvet glow, then layer sheer rose, cherry, or sage jelly gel on top.
- Velvet French Tips: Paint only the French smile line in magnetic gel, pull the shimmer toward the free edge, and flash-cure.
- Magnetic Ombre: Concentrate the brightest shimmer along the top half of the nail while leaving the cuticle soft and sheer.
Safety, Removal & Aftercare
Never cure magnetic gel on skin or cuticles, and always complete a full 60-second cure on the entire hand after your 10-second flash-cures so every layer hardens completely. Remove safely via gentle top-coat buffing and acetone foil wraps—never pry off gel.
Nail Care & Aftercare
Keep cuticles hydrated daily with botanical oil and wear gloves when cleaning to preserve the high-clarity glass top coat that makes velvet shimmer pop.
Frequently Asked Questions
Do I need a special horseshoe magnet for velvet nails?
No. While a U-shaped horseshoe magnet speeds up the process, a standard strong neodymium bar magnet held along all four edges of the nail creates the exact same lush velvet glow.
Why does my cat-eye line look blurry after curing?
Particles drift within seconds if you pause between magnetizing and curing. Keep your UV/LED lamp right beside your hand and flash-cure each nail for 10 seconds immediately.
Related Tutorials

How to Create Micro French Tips: Crisp Hairline Smile Lines at Home
Master razor-thin 1mm French smile lines using a fine liner brush, sheer blush base balancing, and clean-up refinement for an effortlessly elongated manicure.

How to Create Classic White French Tips with Balanced Proportions
Learn the exact geometry behind timeless classic white French tips—from choosing a flattering sheer base to carving deep, symmetrical smile lines.
How to Do Glazed Donut Nails at Home: Luminous Pearl Chrome Technique
Unlock the mirror-smooth pearlescent sheen of glazed donut nails with precise flash-cure timing, dust-free prep, and chip-proof chrome edge sealing.